_1753256285958.png)

_1754990596544.webp)
How to put on a snap hook on a dog leash?
Attaching a snap hook to a dog leash correctly is critical for ensuring your dog's safety during walks, training, or outdoor activities.
Structure of a Snap Hook
A standard snap hook has three key parts that enable its function: the body (the curved metal frame that holds the attachment point), the spring-loaded latch (the small, movable piece that opens and closes the hook's opening), and the eye (the circular or oval loop at the end of the body, where the leash material is attached). The latch is critical for security: when closed, it blocks the hook's opening to prevent the attachment point (like a D-ring) from slipping out. To open the hook, you must press the latch. This compresses the internal spring, creating space for the D-ring or leash material to enter. Familiarizing yourself with how the latch moves (it should press smoothly without sticking) ensures you can operate it easily during attachment.
Before use, inspect the snap hook for damage: check for bent metal, a loose or stuck latch, or rust on the surface. A bent body may not hold the D-ring securely, while a stuck latch could make it impossible to open or close the hook properly. Rust can weaken the metal over time, increasing the risk of breakage. If any damage is found, replace it immediately; never use a faulty hook for your dog's leash.

Locating and Inspecting the Attachment Point
The primary attachment points for a snap hook are either the D-ring on a dog collar or harness (for connecting the leash to your pet) or the end of the leash material itself (for assembling a new leash or replacing a worn hook).
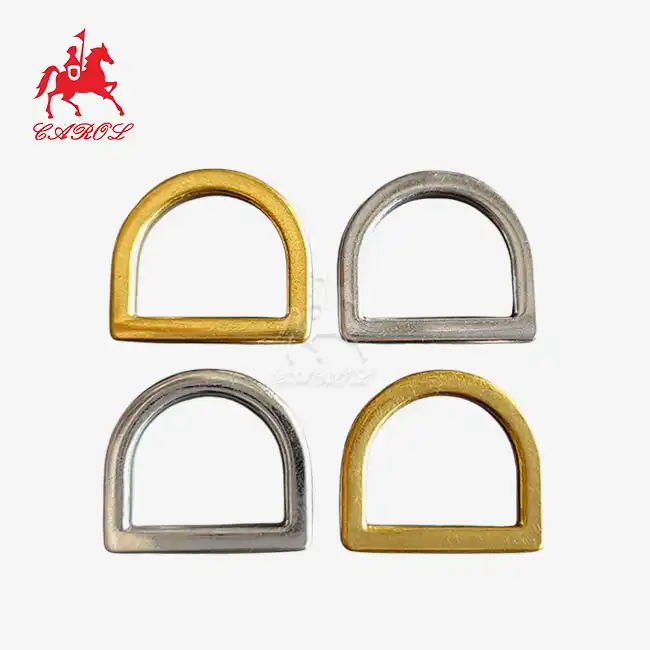
For collars and harnesses: The D-ring is a small, D-shaped metal ring, usually located on the back of the harness (between the shoulder blades) or the top of the collar (near the buckle). Inspect the D-ring to ensure it is securely attached: wiggle it gently to check for looseness (a loose D-ring may come off the collar/harness during use). Look for signs of wear, like stretched metal or frayed stitching around the D-ring's attachment point (on fabric harnesses). If the D-ring is loose or the stitching is frayed, repair or replace the collar/harness before attaching the snap hook.
With components inspected and understood, you're ready to move on to the actual attachment process.
Step-by-Step Guide: Attaching the Snap Hook to Collars, Harnesses, and Leash Material
Attaching a snap hook correctly requires following a sequence of simple but precise steps. Whether you're connecting the leash to your dog's gear or assembling a new leash, focusing on each step ensures a secure fit. Below are detailed guides for the two most common scenarios, with tips to avoid common mistakes.
Scenario 1: Attaching to a Collar or Harness D-Ring
This scenario is for daily use, connecting the leash's snap hook to your dog's collar or harness so you can walk them safely. Follow these steps:
- Position your dog and gear: Have your dog stand calmly (or sit, for easier access) and hold the collar or harness in one hand. If using a harness, ensure it is already properly fitted on your dog (you should be able to slide two fingers between the harness and your dog's body). This prevents the harness from shifting while you attach the snap hook.
- Hold the snap hook and leash: Grip the snap hook's body with your dominant hand (avoid pressing the latch for now) and hold the leash in your other hand. Keep the leash slack; this reduces tension on the snap hook and makes it easier to maneuver.
- Open the snap hook: With your thumb (or index finger), press the spring-loaded latch firmly. You should feel the latch move inward, and the hook's opening will widen. Keep the latch pressed down; releasing it too early will close the hook before the D-ring is in place.
- Slide the D-ring into the hook: Guide the D-ring on the collar/harness into the open hook. Ensure the entire D-ring is inside the hook's body; if only part of the D-ring is inside, it may slip out when tension is applied. The D-ring should rest against the curved part of the hook's body, not the latch.
- Release the latch to secure: Slowly let go of the latch. You should hear a soft “click” as the spring pushes the latch back into place, closing the hook's opening. Visually confirm the latch is fully closed; there should be no gap between the latch and the hook's body. A partially closed latch is a major safety risk, as the D-ring can slip out during walking.
- Perform a quick tug test: Gently but firmly pull the leash away from the collar/harness. This tests if the snap hook holds the D-ring securely. If the hook stays closed and the D-ring does not move, the attachment is secure. If the hook opens or the D-ring slips, repeat the steps, ensuring the D-ring was fully inside the hook and the latch closed completely.
Common mistake to avoid: Rushing the process and not confirming the latch is closed. Always take an extra second to check the latch—this simple step prevents most accidental detachments.

Scenario 2: Attaching to Leash Material (Assembly or Replacement)
This scenario applies when building a new leash or replacing a worn snap hook on an existing leash. Two reliable methods are using a secure knot (like the fisherman’s knot) or a metal crimp; both ensure the snap hook stays attached to the leash material.
Method A: Using a Fisherman's Knot
Method B: Using a Metal Crimp
Once the snap hook is attached, whether to a collar/harness or leash material, the final step is to establish a routine for checking its security and maintaining its functionality.
Ensuring Long-Term Security: Post-Attachment Checks and Maintenance
Attaching the snap hook correctly is just the first step; regular security checks are essential to keep the hook functioning safely.
Pre-Walk Security Checks
Before every walk, spend 30 seconds performing these quick checks to ensure the snap hook is secure:
1. Latch Function Test: Press the snap hook's latch several times. It should move smoothly, opening and closing without sticking. If the latch is stuck, clean it (see maintenance tips below) to remove dirt or debris. Never force a stuck latch, as this can damage the internal spring.
2. Visual Latch Check: After attaching the hook to the collar/harness, look closely at the latch. It should be fully closed, with no gap between the latch and the hook’s body. A gap as small as 1/8 inch can allow the D-ring to slip out, so even minor gaps require reattaching the hook.
3. Tug Test: Give the leash a firm tug (as you did during attachment) to confirm the snap hook holds the D-ring or leash material. This test simulates the tension that occurs when your dog pulls, ensuring the attachment can withstand real-world use. If the hook slips or the D-ring moves, reattach it before walking.
4. Metal Condition Check: Inspect the snap hook for new damage, like scratches, dents, or rust. Scratches are usually harmless, but dents can weaken the metal, and rust can spread over time. If you notice rust, clean it immediately (see below) to prevent further corrosion.
As you consider your options for dog lead hooks, remember that investing in a high-quality product can make a significant difference in your daily walks and adventures with your furry companion. A reliable, well-designed hook not only enhances safety but also adds convenience to your dog-walking routine.
Are you ready to upgrade your dog leash with a premium dog lead hook? Look no further than Carol's exceptional range of Products.

To explore Carol's full range of dog lead hooks and other hardware accessories, or to discuss custom options for your specific requirements, reach out to their knowledgeable team today. Contact Tony at tony@carolxiao.com to learn more.
References
- Pet Product Safety Association. (2024). Snap Hook Safety Guidelines for Dog Leashes.
- American Kennel Club (AKC). (2023). How to Safely Attach a Leash to Your Dog's Collar or Harness.
- Smith, J. D. (2022). Maintenance of Pet Leash Hardware: Extending the Lifespan of Snap Hooks. Journal of Pet Product Engineering, 9(2), 67-83.
- Canine Care Institute. (2023). Knots and Crimps for Dog Leash Assembly: Best Practices.
- Jones, L. M. (2021). Identifying and Preventing Rust in Metal Pet Leash Components. Pet Care Technology Review, 16(4), 109-125.